( Log In ) Log In is for TREC Teachers & Researchers only
  |
| Steve_Marshall |
 Jun 22 2005, 11:41 PM Jun 22 2005, 11:41 PM
Post
#1
|
 TREC Teacher    Group: TREC Team Posts: 78 Joined: 27-April 05 Member No.: 12 |
Monday 6/20/05 #1
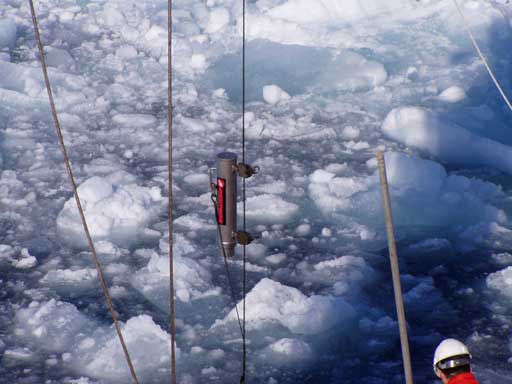
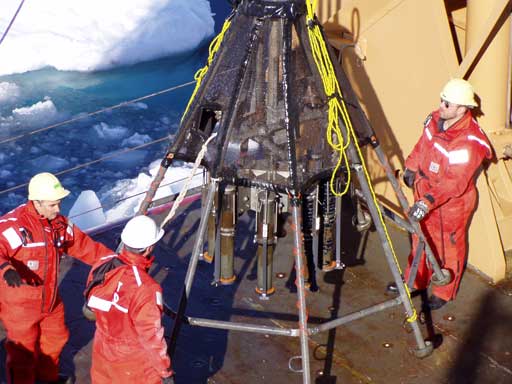
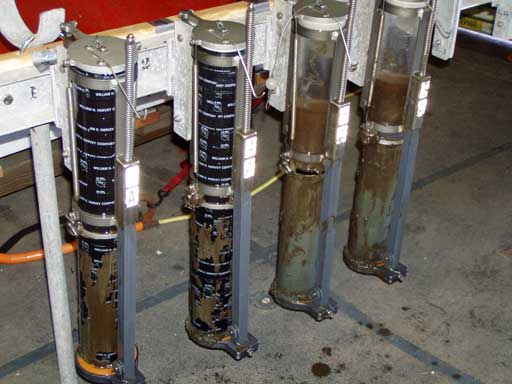
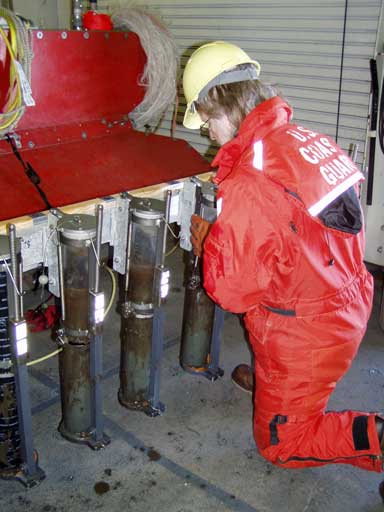
A FULL DAY, STARTING WITH A MULTICORE SAMPLE After a slow start with the first piston core yesterday, the work done today definitely resulted in some fast catching up and a full day of science research. The menu for today was a multi-core sample, another piston core, two plankton tows, and a CTD profile. Because there is so much involved with each type of experiment, I will relate these with separate journal entries. This one will describe the multi-core sampling. Before describing the details of the collection and the resulting research, I should probably explain what a multi-core is, and how it compares to the piston core. The piston core is a single core that is usually much larger than the multicore (our piston cores have ranged from 20 to 60 meters in length). The multi-core samples are much smaller, about 70cm maximum, but there are up to eight separate 70cm cores on a single deployment of the multicore assembly. Another advantage of the multicore is that these samples will be studied immediately on the ship, while the piston core sections will not be analyzed until the ship returns to land. Big Size Difference  This is just PART of the piston core. Use this to compare the lengths of the piston core to a multi-core sample (shown a few pictures below). Because the multi-core is also an important part of this research cruise, I will go into some detail to describe the process, using pictures to help with the explanation: Waiting  Members of the science party wait for the multi-core assembly to be brought back to the surface. Note the ever-present ice patrol (person holding the long pole) needed to keep ice away from the multi-core also Getting Close  The first to arrive on the line is a Niskin bottle. This bottle takes water samples that can be studied in different ways. It’s arrival indicates the multicorer is not far behind. Looks More Like an Alien Spacecraft to Me!  The multicore assembly pictured as it just comes out of the water. It may be a little hard to see, but the actual core samples are the vertical cylindrical tubes towards the center of the assembly Hauling in the Catch  The researchers bring the multicorer to the deck. With people in the picture, this gives you a good sense of scale about the size of the multicore tubes. Remember to compare them to the size of the PARTIAL piston core shown in the picture at the beginning of this journal entry. Secure Storage  Once the multicore assembly is brought on deck, the individual tubes are removed and secured to a rack labeled with the corresponding number printed on the cores. Attaching the Cores  Glenn Berger is shown here fastening one of the core samples to the rack. What’s That Number Again?  The first order of business is to record the length of the cores since they can vary in the amount of sediment each holds. Here, I’m recording the measurements made and called out to me by Stefanie Brachfeld The Liner Lady  Lyanne Yurco is shown here holding some of the core liners that the multicores must be transferred into; A process that is called “extruding the core.” Setting up the Extrusion Process  The core sample is placed on a vertical rack. A liner (the clear tube on top) is then placed above the core sample. A retractable “leg” which has held the sediment in the tube to this point is returned to the “open” position (shown to the right, midway between the core sample and the empty liner), while a metal plate (shown at the bottom of the tube) is used to hold the sediment in the tube until the extracting piston can be put in place. Putting the Piston into Place  Pictured in the middle, Glenn Berger positions the extrusion piston at the bottom of the core sample tube (just below the metal plate that Lyanne is holding. This piston sits on top of a shaft that can be raised or lowered using a drill. Extruding the Core  Once the piston has been inserted far enough into the sample to create an air and water-tight seal, a drill raises the piston into the tube, thus transferring the core sample to the core liner. The liner is then capped (as shown being done here by Guillaume) on the top and then the bottom. Filling In the Empty Space  If the sediment does not fill the entire tube, foam plugs are used to fill in the empty space to prevent movement and mixing of the sediment. Here, Glenn Berger and Stefanie Brachfeld measure the amount of foam needed to fill the core liner. Once the cores are all extruded, logged, and labeled, the scientists could begin their work. I think I mentioned in a previous journal entry that I was amazed at how many different ways a core could be analyzed, but now I was seeing it in action. My next journal entry will be a summary of only a few of those methods. |
  |
1 User(s) are reading this topic (1 Guests and 0 Anonymous Users)
0 Members:

|
NSF Acknowledgment & Disclaimer | Time is now: 16th November 2024 - 06:04 PM |
Invision Power Board
v2.1.7 © 2024 IPS, Inc.


